Read the model’s guidance, keep its intended orientation, and inspect a sliced preview before enabling support. Start with automatic support, choose Grid, Snug or Organic by the geometry shown in the preview, and treat a separate breakaway or soluble support filament as an optional multi-material technique.
The short answer
Do not turn on supports for every model automatically. Start with the model’s print guidance and intended orientation, slice it, and inspect the layer preview. Add support where a part would otherwise begin or continue without enough printed material beneath it. If support is needed, automatic generation is the simplest first pass; choose normal Grid for a stable straight-down structure, normal Snug when you want the support to follow the overhang more closely, or tree with Organic style when branching support reaches separate regions more efficiently.
Those are starting choices, not universal rules. The useful result is not a particular support label or angle: it is a sliced preview in which the required regions are supported, the support itself looks printable, and unnecessary contact with the model has been avoided.
Decide whether the model needs support
A filament printer builds one layer on the previous layer. A steep overhang extends beyond the material below it, while a bridge spans between two supported ends. Some printers and profiles can handle short bridges and gradual overhangs without added material; a slicer’s support threshold is only its rule for deciding where to generate support.
Check orientation before changing support settings. Turning a model can place a broad face on the bed, shorten an overhang or turn a difficult region into a bridge, but it can also create a new unsupported face or weaken the orientation the designer intended. Keep the IteraMesh orientation unless the Preset guidance or your own preview gives you a clear reason to change it.
- Read the Preset’s print guidance for its intended orientation and whether it calls for support.
- Slice once with support disabled and move through the layer preview from the build plate upward.
- Look for regions that begin in mid-air, long unsupported ledges and bridges your printer profile cannot reasonably span.
- If the preview shows continuous printable layers without those problems, leave support off.
Start with automatic support, then correct it
Automatic support asks the slicer to generate structures wherever its geometry rules say they are needed. It is a sensible first pass for a beginner because it exposes the slicer’s full proposal in the preview. Manual support limits generation to regions you mark with support enforcers; blockers can remove support from areas where automatic generation is unnecessary or inaccessible.
| Choice | Use it when | Check before printing |
|---|---|---|
| Automatic | You want the slicer to identify candidate overhangs across the whole model. | Remove support that is excessive, trapped or placed where the model can print without it. |
| Manual or painted | You understand the problem region and want to enforce support only there. | Make sure you did not miss another unsupported region; manual mode does not make that decision for you. |
| Automatic with blockers or enforcers | The automatic result is mostly useful but needs a local correction. | Review the whole layer preview after every painted change. |
Choose Grid, Snug or Organic by the preview
| Support choice | Useful starting case | Main trade-off to inspect |
|---|---|---|
| Normal · Grid | A broad or flat overhang where a stable support rising straight down is useful. | The regular grid is stable, but it can spread beyond the overhang and create more model contact. |
| Normal · Snug | An overhang whose outline you want the support to follow more closely. | It can save material and reduce scarring, but tall, thin towers can be less stable. |
| Tree · Organic | Separate or irregular regions that branching supports can reach from fewer trunks. | It can reduce material and contact, but the branches and their footprint still need to be stable and reachable. |
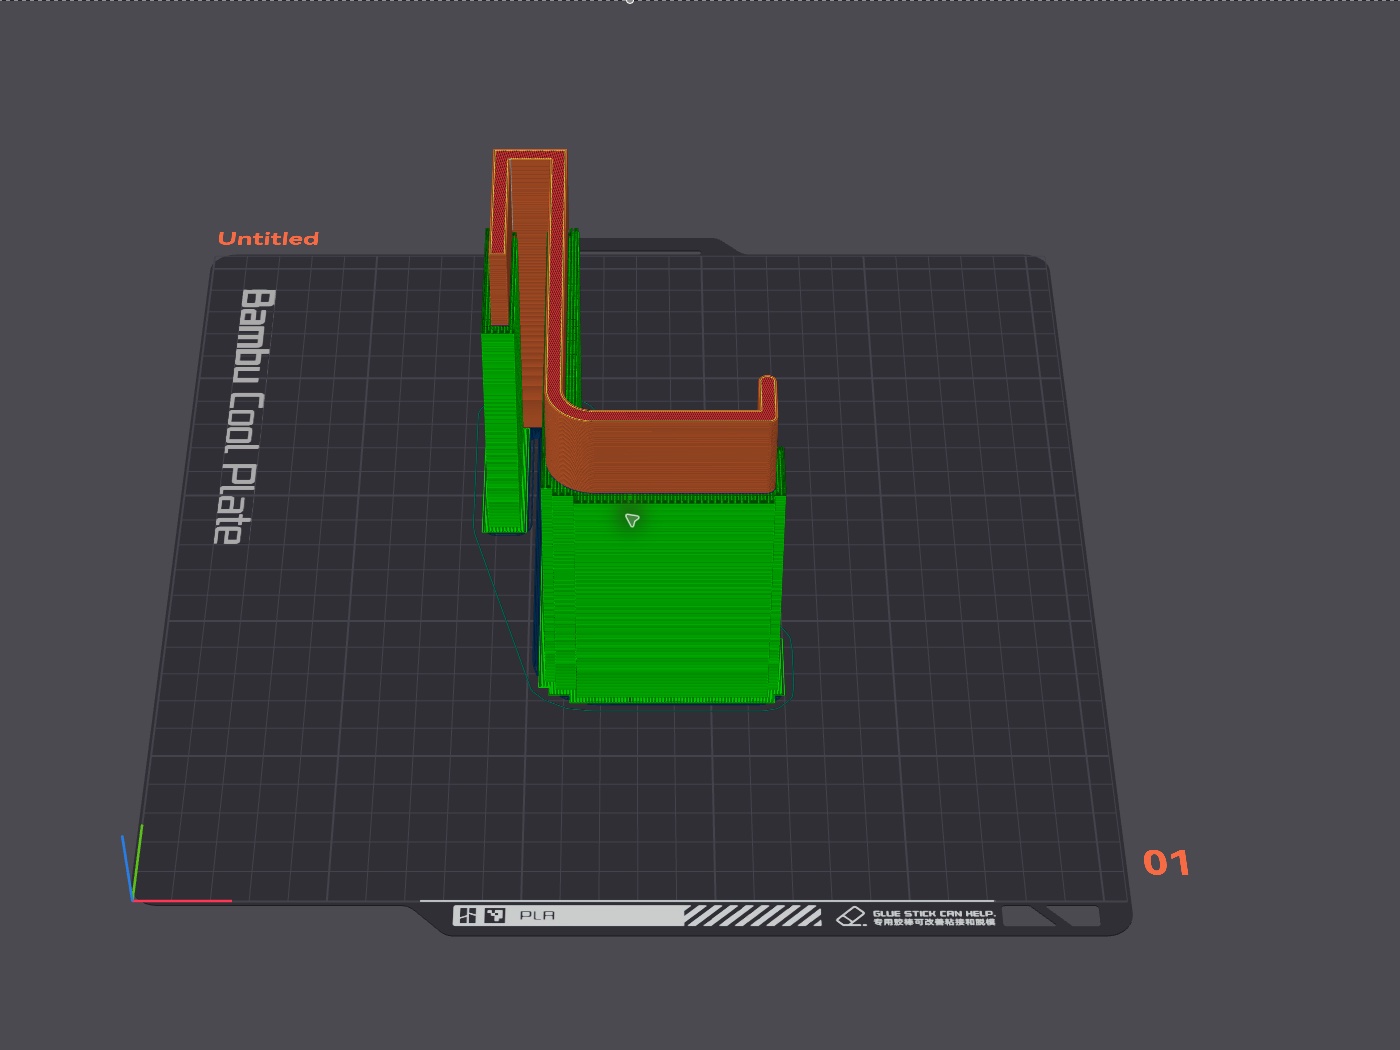
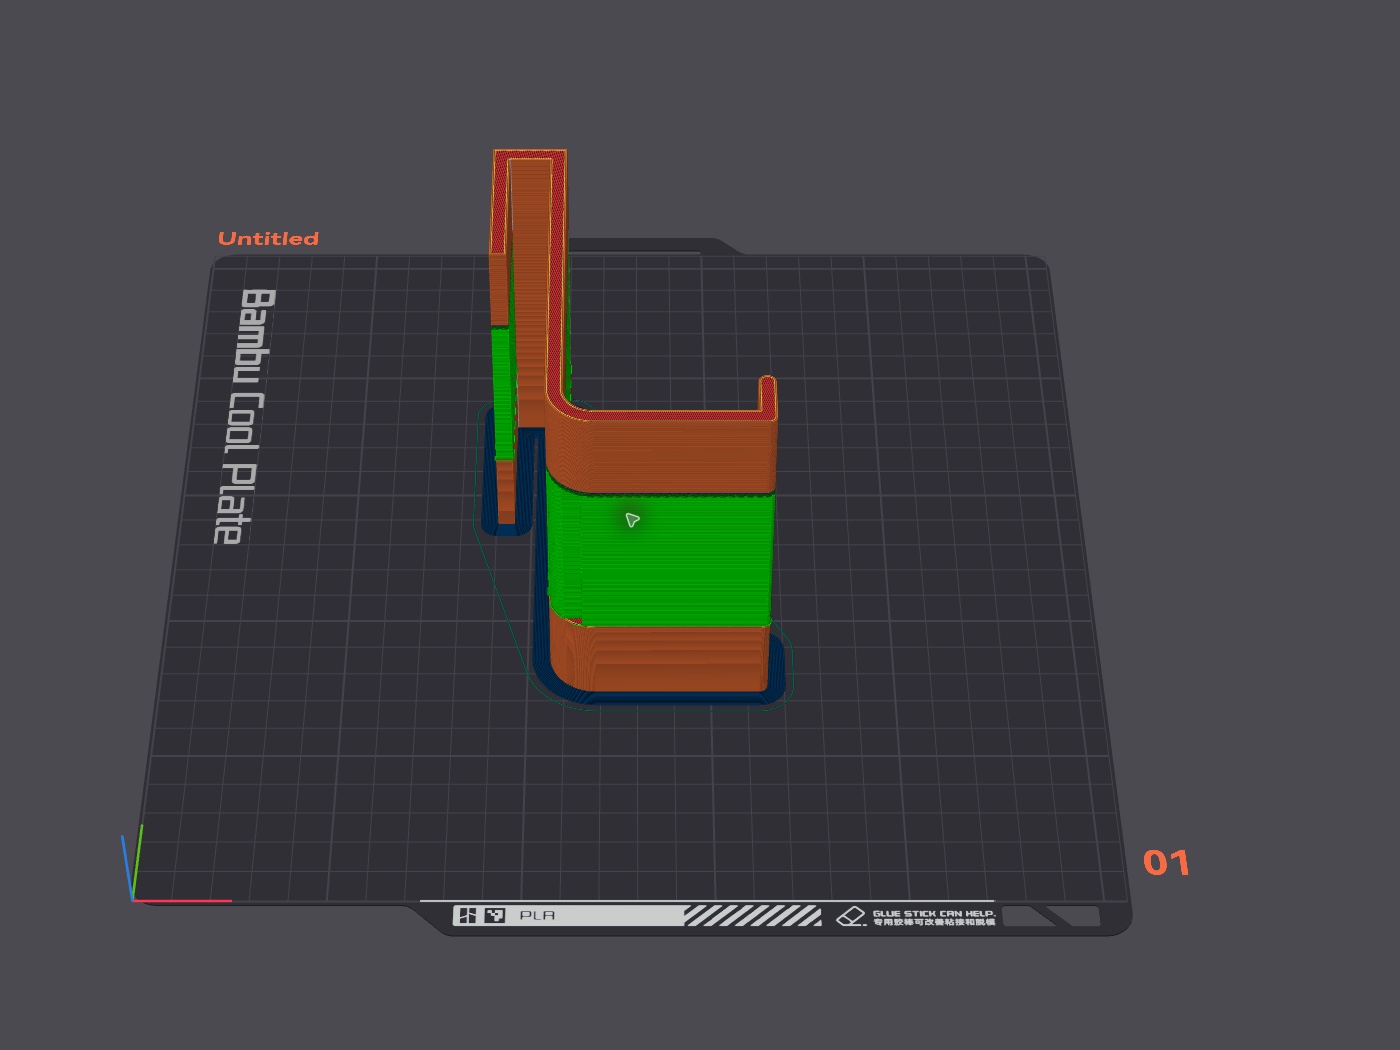
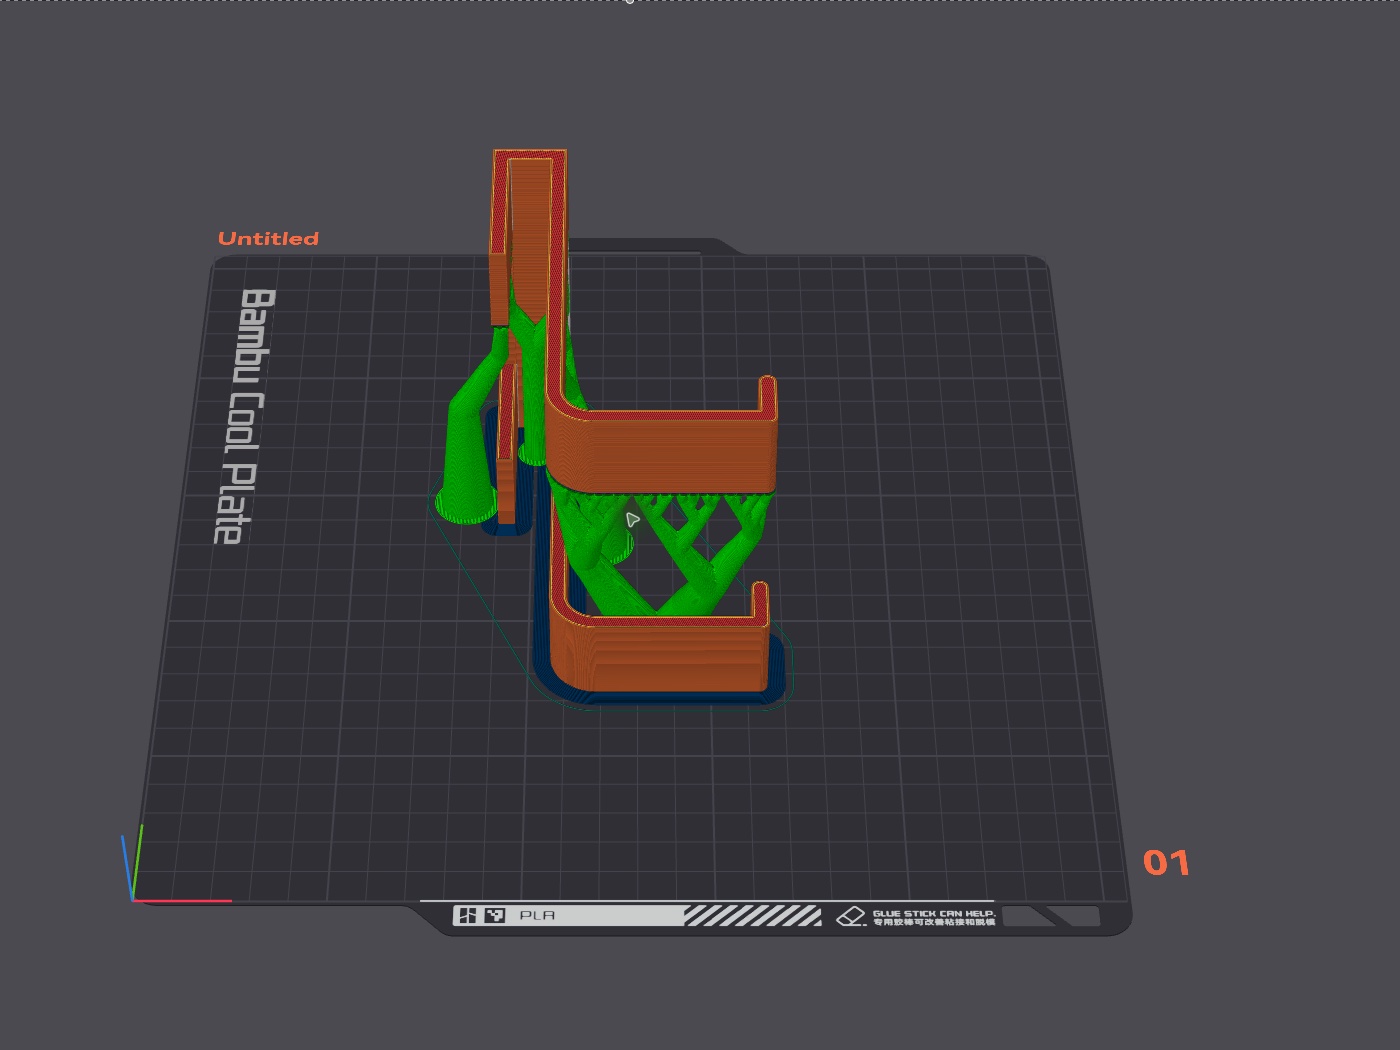
Do not assume tree support is the advanced or automatically better choice. Normal support projects directly beneath an overhang and can be the clearer, more stable result for a large flat region. Tree support is useful when branches can reach several separated regions without building a full tower under each one. Slice both when the choice is unclear and compare the actual paths, contact areas, material estimate and print time shown by your slicer.
A separate support filament is optional
Most beginners can print the model and its supports from the same filament. A multi-material or multi-tool printer can instead use a separate support filament. Breakaway material is intended to separate more cleanly, while soluble material such as PVA or BVOH is removed by dissolving it. Your slicer may assign that material to the whole support or only to the dense interface layers that touch the model.
| Material choice | What it changes | Before choosing it |
|---|---|---|
| Model filament for all support | Uses one loaded material for the model, support body and interface. | This is the simplest starting point; removal depends on the support gap, geometry and material. |
| Breakaway support filament | Uses a second material intended to separate from the model more cleanly. | Confirm that your printer, material pair and slicer profile are compatible. |
| Soluble PVA or BVOH | Lets water remove support or an interface that may be difficult to reach by hand. | It needs compatible multi-material hardware, careful dry storage, purging and a suitable profile. |
Using the special filament only for the support interface usually consumes less of it than printing the entire support body from that material. The trade-off is extra filament changes, purging, print time and waste. Soluble support is also moisture-sensitive and more demanding to print, so treat it as an option for a specific hard-to-remove region rather than the default answer for a first supported print.
Inspect the support as part of the print
After enabling support, inspect the sliced result again rather than trusting the setting name. Follow the layers upward and confirm that support starts on the build plate or another printable surface, reaches the intended overhang, and does not leave a tall isolated tower likely to be unstable. Check that support is not enclosed where you cannot remove it and that it does not block a hole or fitted surface unnecessarily.
- Support reaches every region you intended to protect.
- The support base and any branches remain connected and stable through the preview.
- The contact area is limited enough that removal is practical for the model’s shape.
- Bridges intentionally left unsupported are anchored at both ends and look reasonable for your printer profile.
- The final material and time estimates are acceptable before you export or send the job.
Use profile defaults, not universal numbers
There is no single safe support angle, contact gap or density for every printer and model. Layer height, line width, cooling, material, geometry and printer calibration all change what can bridge or overhang cleanly and how easily support separates. Begin with the tested profile for your printer and filament instead of copying a number from another machine.
Supports can improve a difficult overhang, but they can also leave marks, change the underside finish, take time to remove or damage a delicate feature during removal. This Guide explains how to choose and inspect support; it does not claim a successful print or a proven setting for the linked Preset. For an important surface or an unfamiliar machine, use a small representative test before committing to the whole model.
Apply the checks to a model that needs supports
The Squeegee holder Preset specifically tells you to turn on supports. Open it, read its print guidance, then use the sliced preview to decide where those supports should go and which style makes sense for your setup.